Complete Guide to Fixture Plates, Tooling Plates, and Modular Fixtures
This Complete Guide from CNC Cookbook walks you through what they are, how to use them, how to make one, and a review of a popular fixture plate so you know what to look for when purchasing your own.
Special thanks from our friends at CNC Cookbook for this guest post. Learn more about CNC Cookbook and how they can help you become a better CNC'er at cnccookbook.com.
A Quick Video Introduction to Fixture Plates
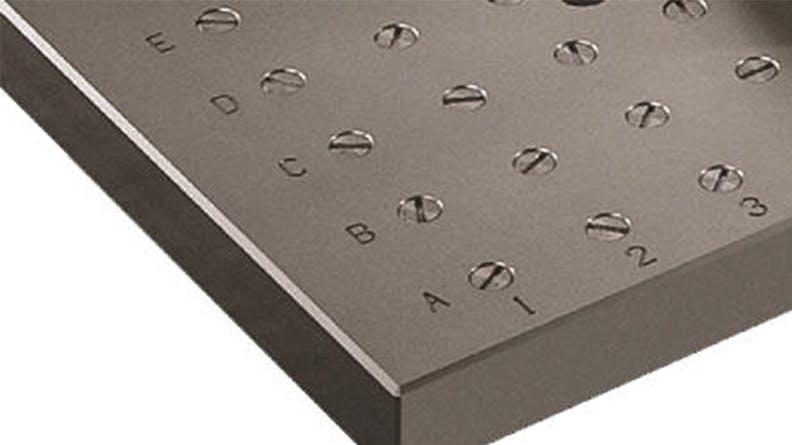
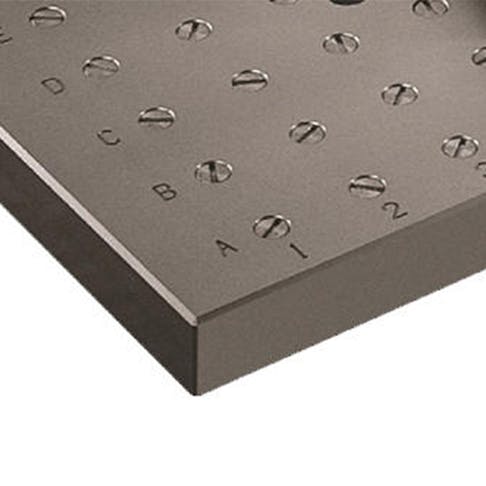
Pictured above is a typical Fixture Plate. Some things to note about it:
- There’s a grid of threaded holes there. They’re protected from chips by set screws that you remove when you’re ready to use a particular hole.
- Engraved letters and numbers create a coordinate system to uniquely identify each hole.
Install a Fixture plate on your CNC Mill’s table. Most CNC mills have T-Slot tables like this one:
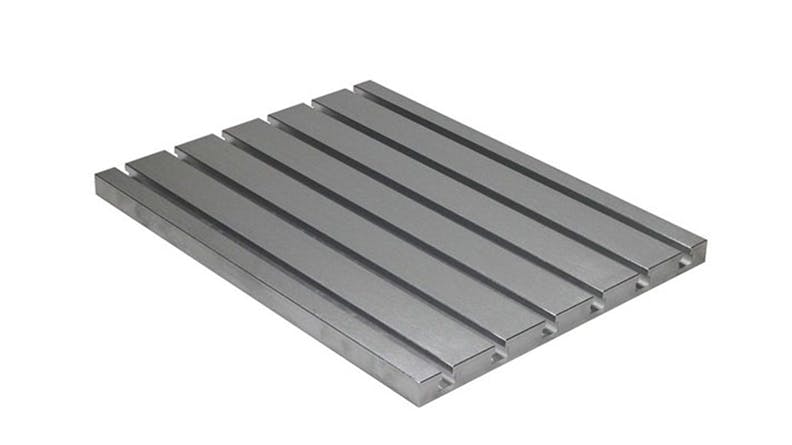
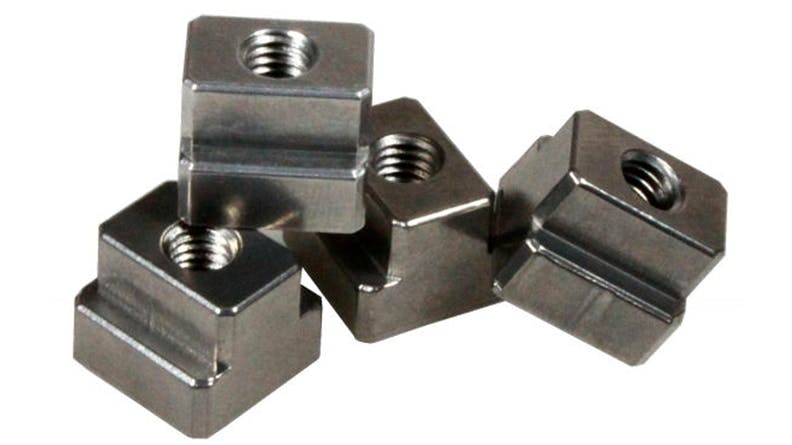
Secure Workholding devices such as fixtures and vises to the machine’s table using bolts and T-Slot nuts as seen below. The nuts slide along the T-Slot until positioned where you want them. With a fixture plate, bolt fixtures on using the threaded holes in the plate.
Why use a Fixture Plate?
We can bolt fixtures onto the mill table just fine with T-Slots. So why use a fixture plate at all?
With T-Slots, the T-Slot nuts slide. A fixture can thus be located anywhere. That sounds great except that the fixtures can be anywhere. With a Fixture Plate, your fixtures can’t be located anywhere. They have to go into the grid of available holes. In other words, with a Fixture Plate, fixtures are always at a well-defined location.
What if your g-code programs could take advantage of a fixture always being in the same place? With T-Slots, you install the fixture, measure its location, and then set up a work offset to tell the g-code where the fixture is. That takes a lot of time.
With a fixture plate, you measure the location once, and so long as you always install the fixture in the same holes, you won’t need to measure again.
That saves a lot of time during setup. In fact, not only is the fixture in the same place, but it is also oriented in the same way. With T-Slots, you can get a fixture clamped down to the slots, and not only is it not always in the same place, but it could also be slightly rotated or cocked in its location.
This is a problem for things like vises, where we want the jaws to be parallel to the X-axis travel of the machine. In fact, operators spend time aligning vises with that travel, a process called tramming the vise. But with a fixture plate, the vise can be accurately installed and square, so you skip the tramming step. More time saved!
Modern shops see a lot of what’s called High Mix Low Volume work. That means they make a lot of different parts, but very few of each specific part. Because of that, setup time is a bigger percentage of shop time than it used to be. Using a Fixture Plate reduces that time and so is very important for High Mix Low Volume Work.
Fixture Plates will save you time, but they have a couple of other advantages too. They present a clean path for coolant and chips to escape. They also help protect your machine’s table from crashes, dings, and other damage.
Here’s another advantage of Fixture Plates–they make machining parts that are too big for your machine’s travel easier.
With an accurate Fixture Plate, you can machine big parts in sections, moving the part to allow access to each section. That’s very hard to impossible to do with T-Slots. For more on machining big parts see this article.
Fixture Plate G-Code Programming
Let’s see how to combine Fixture Plates with a little simple g-code programming to save time.
One idea is to take advantage of the hole grid on the fixture plate by pre-programming work offsets to where your fixtures go. But on the other hand, with some controls, you run out of work offsets pretty quickly. You’ll have to reuse them, since they’re scarce. Or, you’re in a shop environment where someone else may have changed a work offset without telling you. You can’t rely on them staying the same.
How do you handle that?
Well, you could indicate the work offset from the vises (or fixtures) each time. That wastes the potential of the modular fixturing setup though.
What if you could run a little g-code program to set the work offsets up for each fixture? Maybe you have a standard library of these little initialization programs, or maybe a USB key with the program accompanies each fixture. Either way, if you could just run that little program and initialize your work offsets to the proper values for your fixture, that would be very slick and could save you a lot of time, right?
Lucky you–it turns out that a g-code called “G10” is perfect for doing exactly that!
With G10, you can set the values for any work offset. Let’s say the coordinates of the fixed rear jaw, left front corner, on the left vise in the picture above are X20.0 Y11.733 Z0.0 on that left jaw when you drop it into the proper grid position on the fixture plate. You’ve also got a set of fixed coordinates for the right vise. Run your short g-code program with a couple of G10’s in it, and Bob’s your uncle (not really), the work offsets are set and you’re ready to start running parts.
For full details on how to use G10, check out the new chapter I just created for our free g-code course: G10 setting tool and work offsets. You are going to love how easy it is to use G10 and how much it helps you to automate your setup further with modular fixtures. Hey, if you’ve never done any g-code programming, don’t worry. We have a free course on the basics of g-code programming, G10 is easy, and our G-Wizard Editor software will even simulate it so you can practice your G10 work before you have to run it on a live machine.
Soon you’ll wonder why you wasting so much time setting things manually!
Fixture Plate Review: Tosa Tool Fixture Plate
Let’s go a little more in-depth with a particular feature plate. I received a plate from Dan Bye of Tosa Tool for review purposes and installed it on my Tormach PCNC 1100 CNC Mill. Yes, journalists get free product a lot of time, but I’ll tell you the straight 411 about a product anyway. My CNCCookbook business is far more important to me than any review, so I’m not afraid to be critical if need be.
Tosa Tool specializes in modular fixturing solutions. Fixture plates are literally the foundation for modular fixturing. The plate I received was their model TT1634C but with some minor blemishes not affecting its function. I got mine free, but the normal cost for the exact same plate is $1100. It measures 34″ x 16″ x 3/4″ thick, and is larger than the Tormach’s table.
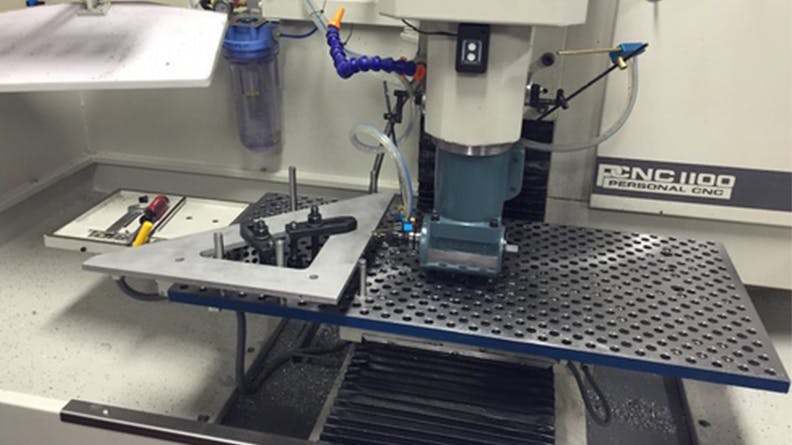
Note that some of the stand-offs for this right angle drilling rig are off the table. Handy to have a larger fixture plate!
It still fits fine in the PCNC 1100 enclosure. Plus, the larger size means there is room for fixture related stuff to sit outside the work envelope. That can be important when trying to use the full envelope.
Installing the Tosa Tool Fixture Plate
Installing the Tosa Tool Fixture plate took a grand total of about 20 minutes. Making sure it was set up correctly was easy to do using their key system.
These plates are HEAVY, so take care and get help if need be. One thing to keep in mind when handling heavy components is don’t ever lift them clear. It’s all about tilting and pivoting so that most of the weight is supported by the machine table. Then all you have to do is safely guide the plate to its desired location. Also, be careful not to pinch your skin between Fixture Plate and Table or you’ll be sorry!
I used the following procedure to install the Fixture Plate on my Tormach:
1. Unbox the Fixture Plate from its crate.
2. Clean your machine’s table so there’s no chips or debris. Stone away any nicks and imperfections. You want a good surface for the Fixture Plate to lay on.
3. Lay down some rust preventative on your machine table. I like to use a product intended for firearms called “Break-Free.” It’s available inexpensively from Amazon–about $22 for a nice spray bottle as I write this. I use it constantly around the shop to rust proof my tools. Put down a lot more than you think you need. I made a virtual oil slick that made it easy to slide the Fixture Plate around until it was position perfectly.
4. Pick up the Fixture Plate from its crate, the position is bottom side up, and lay it on the machine table. Yes, that’s right, lay it on there upside down.
5. Install the keys in 2 dowel holes on the underside of the plate.
6. Pivot the plate to expose the T-Slots on the right side of the table. Pivoting is easy with the oil slick of rust preventative!
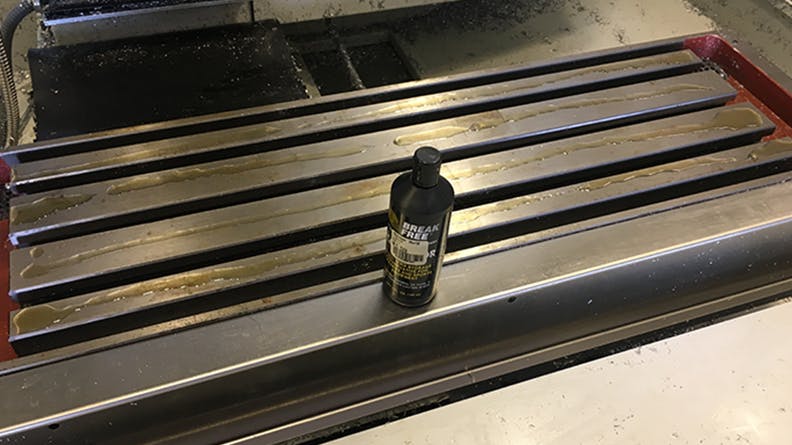
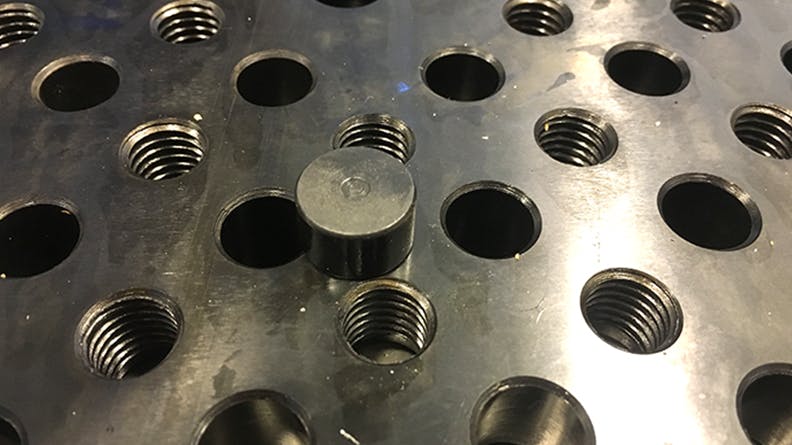
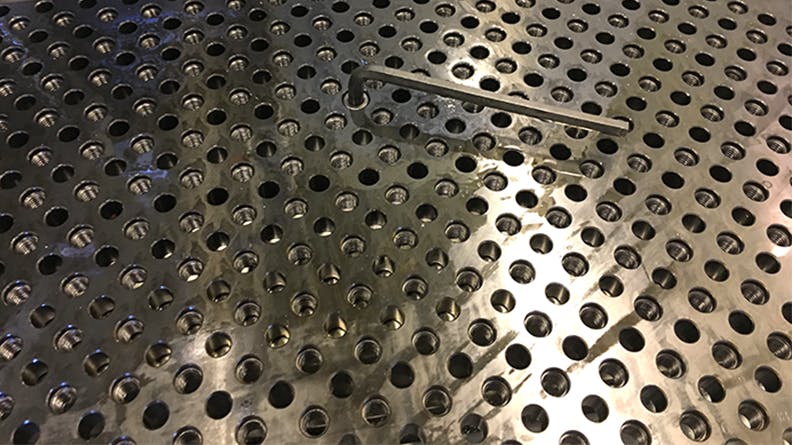
3. Lay down some rust preventative on your machine table.
7. Install 3 T-Slot Nuts, one in each slot. Position the top and bottom at the right end of the T-Slot. Slide the middle one as close to the center as you can reach.
8. Pivot the other way to expose the T-Slots on the left side.
9. Install 2 T-Slot Nuts in the top and bottom T-Slots on the left. Position them at the end of the T-Slot.
10. Flip the Fixture Plate so the keys are down near or on the middle T-Slot
11. Pivot the Fixture Plate so it lines up flush with the back and right edges of the table. If it wasn’t already seated with the keys, they’ll drop into place.
12. Now, having made sure the Fixture Plate is in the right place, you can see where the T-Slot Nuts are. Use a tool such as a drift to reach through the Fixture Plate holes and align the T-Slot Nuts with the proper holes.
13. Finger tighten the 5 Cap Screws, then go back and use a hex key to snug them down.
You’re done installing your new Tosa Tool Fixture Plate! And wasn’t that easy? The alignment keys for the T-Slots and the oil slick of rust preventative made it super easy for me.
Nice Features
The Tosa Tool Fixture Plates are well made and have some premium features found on much more expensive plates and not available from the other inexpensive vendors. Here are my favorites:
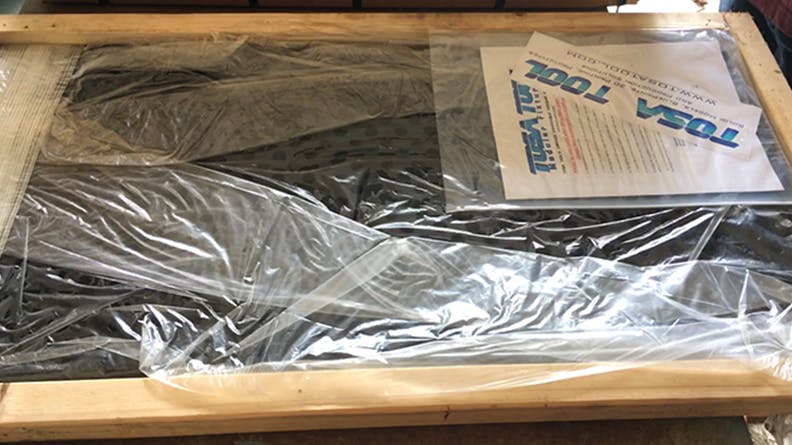
Packed in a Wooden Crate, not Cardboard
My Tosa Fixture Plate arrived in a nice wooden crate. No cardboard here! It’s a precision component, so I appreciate the extra protection afforded by the crate.
Keys for the T-Slots
I love the key system for aligning the Tosa Tool Fixture Plate to the machine’s T-Slots.
Mixture of Dowel Pin (Smooth) and Threaded Holes
The hole grid on a Tosa Tool Fixture Plate alternates smooth (dowel pin) and threaded holes. The threaded holes take 1/2-13 bolts, and the dowel pin holes are 0.5005″ in diameter and finished smooth.
Why 2 kinds of holes?
Some vendors tap every single hole on the plate, but having both smooth bore and threaded holes is a better design. When using a Fixture Plate, the holes perform 2 functions:
- Location: This is the role of dowel pin (smooth) holes on the Tosa Fixture Plates.
- Fastening: This is the role of threaded holes.
If we make one hole perform both functions, we reduce the tolerance and repeatability with which we can perform the Location function. Imagine dropping a dowel pin down two bores. One is half or even 1/3 as long as the other. Remember, we’re talking 1/2″ diameters in bores that are 3/4 to maybe 0.8″ deep. There’s a chamfer at the top and bottom so we have even less length available. Which bore is going to hold the pin more accurately vertical and in position?
My money is on the full depth bore. If you do go with a combination bore (threaded and smooth sections), make sure the smooth section is at least 1 diameter in depth so dowel pins are positioned with sufficient accuracy
In addition, if we have to thread a shorter length to make room for a Locating Dowel Pin, we reduce the amount of thread available for fastening. What will that do to the strength and stability of our workholding solution?
Steel vs Aluminum Fixture Plates
Dan makes fixture plates from a couple grades of steel (Hot Rolled (“H” plates) and 4140 (“C” plates)), but he does not sell aluminum plates. He tried them for a while, recommending them only to those who work with wood and plastics. I think he may have a few in stock that are “deals”, but he has discontinued making any more.
Steel plates receive a Black Oxide treatment to protect them from rust while aluminum plates are anodized. The “C” plates of 4140 are the most expensive because of the greater material expense.
Aluminum Fixture Plates are available from some other vendors, and they are considerably cheaper. So why use steel? There are a number of reasons:
- Vibration is always an issue with machine tools, and aluminum has a much lower damping capacity than steel.
- The Thermal Expansion of aluminum is also higher than for steel. We’re looking to Fixture Plates for accuracy and repeatability, but if temperatures change much, aluminum will make that a problem. Especially when we consider the large size of a Fixture Plate, which can magnify the issue.
- As we all know, steel is quite a bit stronger than aluminum. Again, we’re looking to our Fixture Plate for accuracy, but we’re also looking for durability over time. Aluminum is much more likely to get nicked. The dowel holes can become deformed by lateral pressure on steel pins (especially when they’re not full depth), and threads can be pulled out of aluminum more easily. If your holes are multi-purpose (i.e. smooth bore at top and threads at bottom) and you tap a dowel pin into the hole, you’ll trash the aluminum threads below pretty quickly.
- Aluminum and your table’s cast iron will suffer galvanic corrosion together. Hard anodizing the aluminum will help a ton to reduce that.
Aluminum is a great material for many purposes, but I prefer steel for Fixture Plates. The one exception is where weight is a problem. This is more likely an issue for rotary axis tombstones than for Fixture Plates.
One way to improve on an aluminum plate is to install hardened bushings. Of course this will negate most if not all the cost advantage. One can also choose to install the hardened bushing only on holes that become damaged.
Precision Made
When Dan Bye makes a Fixture Plate, he specifies that the hole bores are located within 0.0004″ tolerance. Plates are blanchard ground to start and finish ground at the end. Every 5th plate is checked on aCMM (Coordinate Measuring Machine)to ensure tolerances stay tight. Sounds great, but why is it so important?
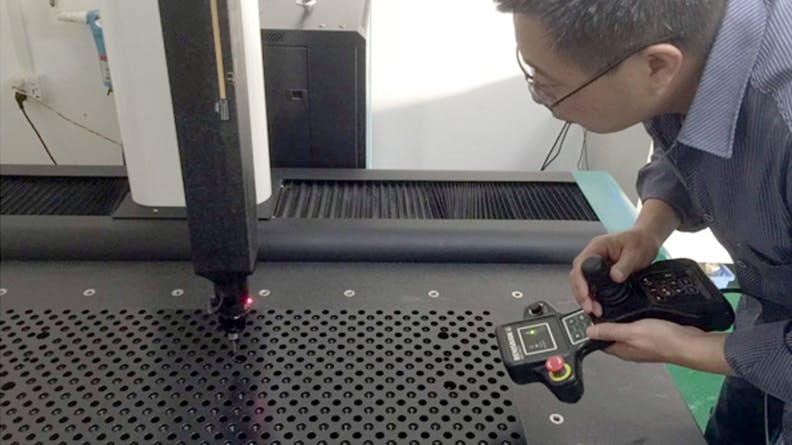
Inspecting Tosa Tool plates on a CMM to ensure tight tolerance.
The precision doesn’t affect most of the functions of a Fixture Plate at first glance. After all, the fact a hole is off its theoretical ideal position by 0.001″ doesn’t affect repeatability or most other factors. What it does affect is how easily we can use more than one hole to locate and orient whatever we’re positioning on the Fixture Plate.
In an example below, I set up a vise on the Fixture Plate and it is properly trammed with no further effort. That means the three locator pins have to be positioned relative to one another with sufficient tolerance for that to happen.
But it gets worse. Let’s say I want to make a little sub-plate that drops on to the fixture plate. We’ll use dowel pins to position the sub-plate and bolts to hold it down. This is a very common scenario when putting, for example, a plate fixture, down on the Fixture Plate.
There’s no give in any of the dowel pin holes to speak of–they have to be pretty tight for everything to line up. In fact, we may have to tap them into place with our brass machinist’s hammer. Now imagine every single hole on the Fixture Plate is off by 0.001″. That means we probably have to know exactly which holes the sub-plate will be mated to and it can’t sit just anywhere on the table. We also have to know exactly where those holes are literally by measuring them.
Suddenly our Fixture Plate is a lot less convenient to use. The alternative is we loosen up tolerances and make bigger holes in the sub-plate. Of course that means it will be positioned less accurately.
You don’t want a Fixture Plate that isn’t made to pretty exacting standards, otherwise it can’t do its job of locating things accurately and repeatably very well.
Economical Pricing
Tosa Tool’s Fixture Plates are not the cheapest available, but they’re very economical when you consider how well they’re made and what the alternatives are that include similar features.
Part of a System
I saved the best for last. Fixture Plates are just the starting point for true Modular Fixturing solutions. Tosa Tool has an extensive line of accessories that cover virtually any need. At his price points, that is unusual to see, but it is the norm for much more expensive high-end solutions. It’s great to be able to add more capability through these accessories which are also very reasonably priced.
I have a number of the accessories, and more are coming along soon. I’ll be adding either to this article or in separate articles to talk about them over time.
Example: Set Up a Vise on a Fixture Plate
Now that you’ve got a Fixture Plate on your mill, let’s do something useful with it. Consider setting up a vise on the Fixture Plate. We’ll use our normal clamps to mount the vise, except that they’re screwed into the fixture plate instead of T-Slot Nuts. I’m not going to bother showing that because it’s nothing new.
But here’s what is new:
We can ensure the vise is installed repeatably in the same location and perfectly trammed very easily. Basically, the Fixture Plate locates your vise in the Z direction, so what we need to do is repeatably locate the rectangular base to an exact location and make sure it’s square.
Doing that requires us to locate 3 points, which are shown below. I’m using some dowel pins that are part of Tosa’s modular fixturing kit. It comes with a variety of gizmos.
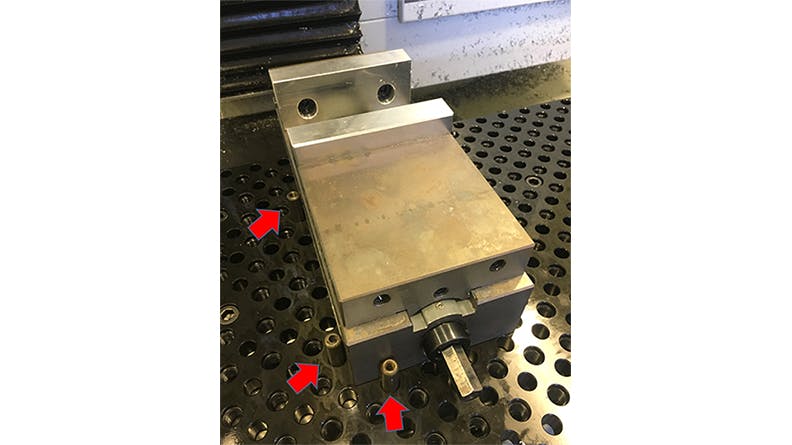
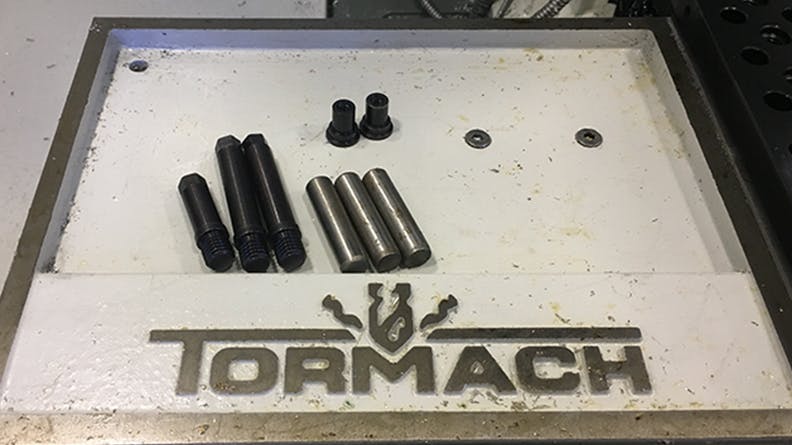
Using dowel pins
To use the three pins, place the vise on the Fixture Plate and slide it up against the two side pins. This locates the vise on the X-axis and ensures it is square (trammed) to the Fixture Plate.
Next, slide it back so the rear edge contacts the rear locating pin. That locates the vise on the Y-axis.
We’ve now located the vise on all 3 axes and ensured it is square to the table. If we take care while clamping to ensure the vise remains in contact with the three pins, we will have installed it ready to go in a very short time. No tramming required!
We can set up a work offset on the machine for the left corner of the fixed jaw, and the g-code will also know exactly where to find the vise and can assume that corner is part zero. Now if we design parts with that in mind, we save all sorts of time.
And, if we need to pull the vise off and use another fixture, we can put the vise back on when finished with the other fixture and not even have to change our work offset (assuming it still has the old value).
Are you beginning to see the value of Modular Fixtures and Fixture Plates?
We can make the install go even faster by using a sub-plate that the vise is mounted to. Tosa Tool makes one just for that purpose.
Build Your Own Fixture Plate
If you’re like me, you considered building your own Fixture Plate. Seems pretty straightforward, right? I will lay out what you need to know to build a fixture plate, but before doing that, let’s talk about whether it’s worth it.
You have to consider two things. First is the cost of the material is significant. Second is the accuracy is not that easy to attain, particularly for a plate that will be larger than the travels of your machine. Unless you’re an exceptional machinist, you probably won’t be able to build a plate larger than your machine’s travels that is also accurate enough.
When you keep all that in mind, the pricing on commercial fixture plates suddenly makes a lot more sense, but lets run through the exercise and understand a little about how to make one anyway. If nothing else, you may use some of these techniques to make sub-plates you’ll install on a commercial Fixture Plate you’ve purchased.
Material Costs
Let’s start out looking at material costs. Given the issues make a plate larger than my machine’s travels, I will be looking at dimensions of 34 x 12 x 3/4″. I will shoot for 4140 Pre-Hardened plate as well.
I came up with quotes that ranged from $739 to $837 for Hardened and Ground Plate. So my starting point is already not cheap. I can get 6061 aluminum for $433’ish, but we’ve talked about the issues with aluminum plates. If I’m going to all the trouble to make a Fixture Plate, I want it to last a long time.
The Machining Process
I would start by machining some keyed dowel pins that can be used to key the plate to the T-Slots.
Note that I’ll need 2 sets of these keys:
- First set is extended reach. It has to reach past the 1-2-3 blocks that will hold the plate off the table while I am machining through holes.
- Second set is normal reach, and will be used once we’re done machining the plate supported on 1-2-3 blocks.
Making those keys is an easy job on a lathe.
I would also be very tempted to send the plate off to a shop to machine the edges square. Having gotten the plate back, it’s time to machine the holes for the keyed dowel pins. I’ve got a clamping challenge already because the Fixture Plate completely covers the table. I will use some big clamps that can reach under the table and set the plate on some 1-2-3 blocks so I can drill through holes.
Once clamped in place, the dowel pin holes are drilled undersized them reamed to size. Their position is not super-critical, but we should still spot drill and use screw machine-length twist drills.
Having done the dowel pin holes for the keys, we do the large through holes for the countersunk socket head cap screws that will hold the plate down with T-Slot Nuts. We’ll make these a touch oversized so we have plenty of clearance without disturbing the keys.
Once that’s done, I will unclamp the plate and install a set of keys, then re-clamp the plate so it is keyed to the table and secured with T-Slot Nuts.
Now the real fun begins. We have to drill about a zillion holes. We will do alternating threaded and smooth bores, all the holes get reamed in at least one if not two sizes, they all get chamfered, and they all get spot drilled. Plus, we need to position these holes as accurately as possible.
What that means is we need to program with exact stop g-codes and also program so we move far enough in the same direction that there is no possibility for backlash to interfere. Spot drilling, using screw machine-length twist drills, and reaming also helps.
Phew!
I don’t know about you, but that’s just a lot of work. If you enjoy it, great, go for it. But I can’t see you’re going to save an awful lot of money. And if you manage to screw up? Dang, that’s an expensive piece of work material to replace.
