
How to Use the Xometry Instant Quoting Engine®
Check out this helpful guide to learn how Xometry works and all the features available to you in our proprietary platform.
Our AI-powered platform makes it easy to build your next big idea by giving you instant pricing, lead times, and DFM feedback for your custom parts.
With the Xometry Instant Quoting Engine®, you can instantly access the production capacity of over 10,000 manufacturers with wide-ranging capabilities, including CNC machining, 3D printing, injection molding (manually quoted in 24-48 hours), laser and sheet cutting, sheet metal fabrication, and more. In addition to our self-guided instant quoting experience, we also offer sales-assisted quoting requests. Go to our page about it to learn more about requesting a quote.
If you have never used the Xometry platform before, you’ve come to the right place. If you only have a few minutes, we recommend watching our short explainer video above.
If you want a more in-depth walkthrough of our instant quoting process, let’s go through it step by step.
Have a high volume production project? Request a Quote With Xometry.
Step #1: Create Your Account and Add Billing Contact Information
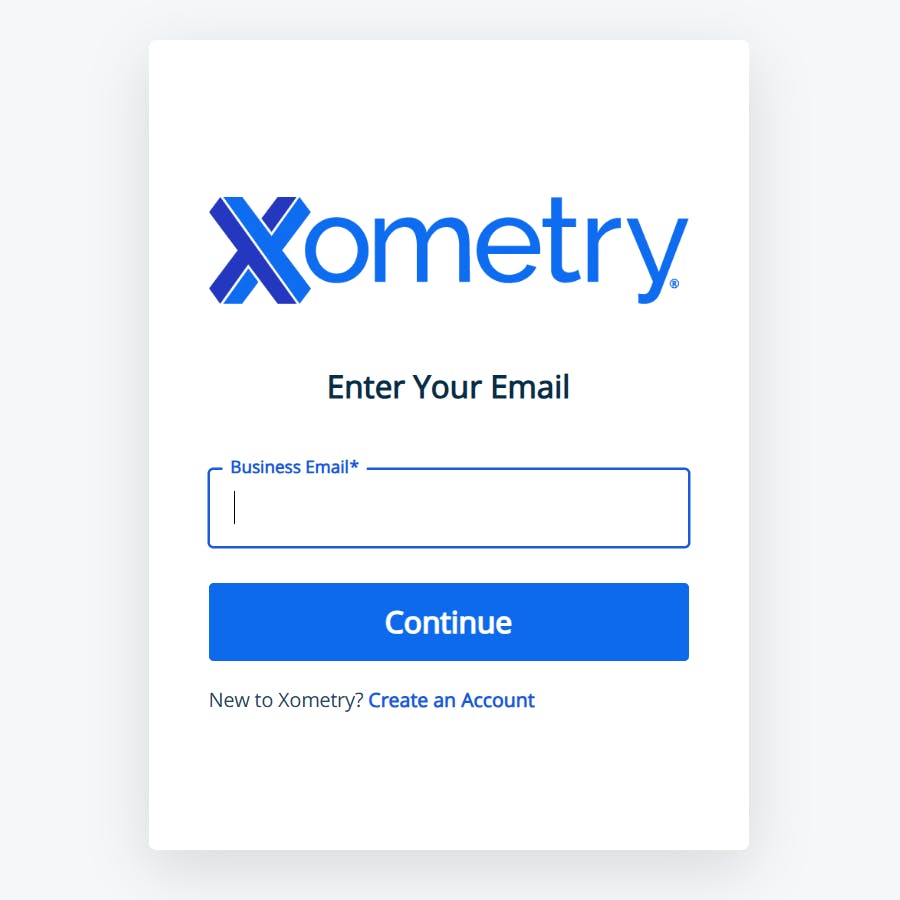
If you haven’t already created an account, please do so now.
Head to https://login.xometry.com/signup/ and enter your information into the appropriate fields.
Need credit terms? To pay on terms or with a purchase order (PO), you must add billing contact information and submit a Terms Setup Form; If you still need to do so, you can start by going to your Account Settings page. Once finished, click the “Get Started” button in the payment terms section to begin the credit approval process.
Click here to learn how to set up credit terms and pay with a PO.
Step #2: Upload Your Files
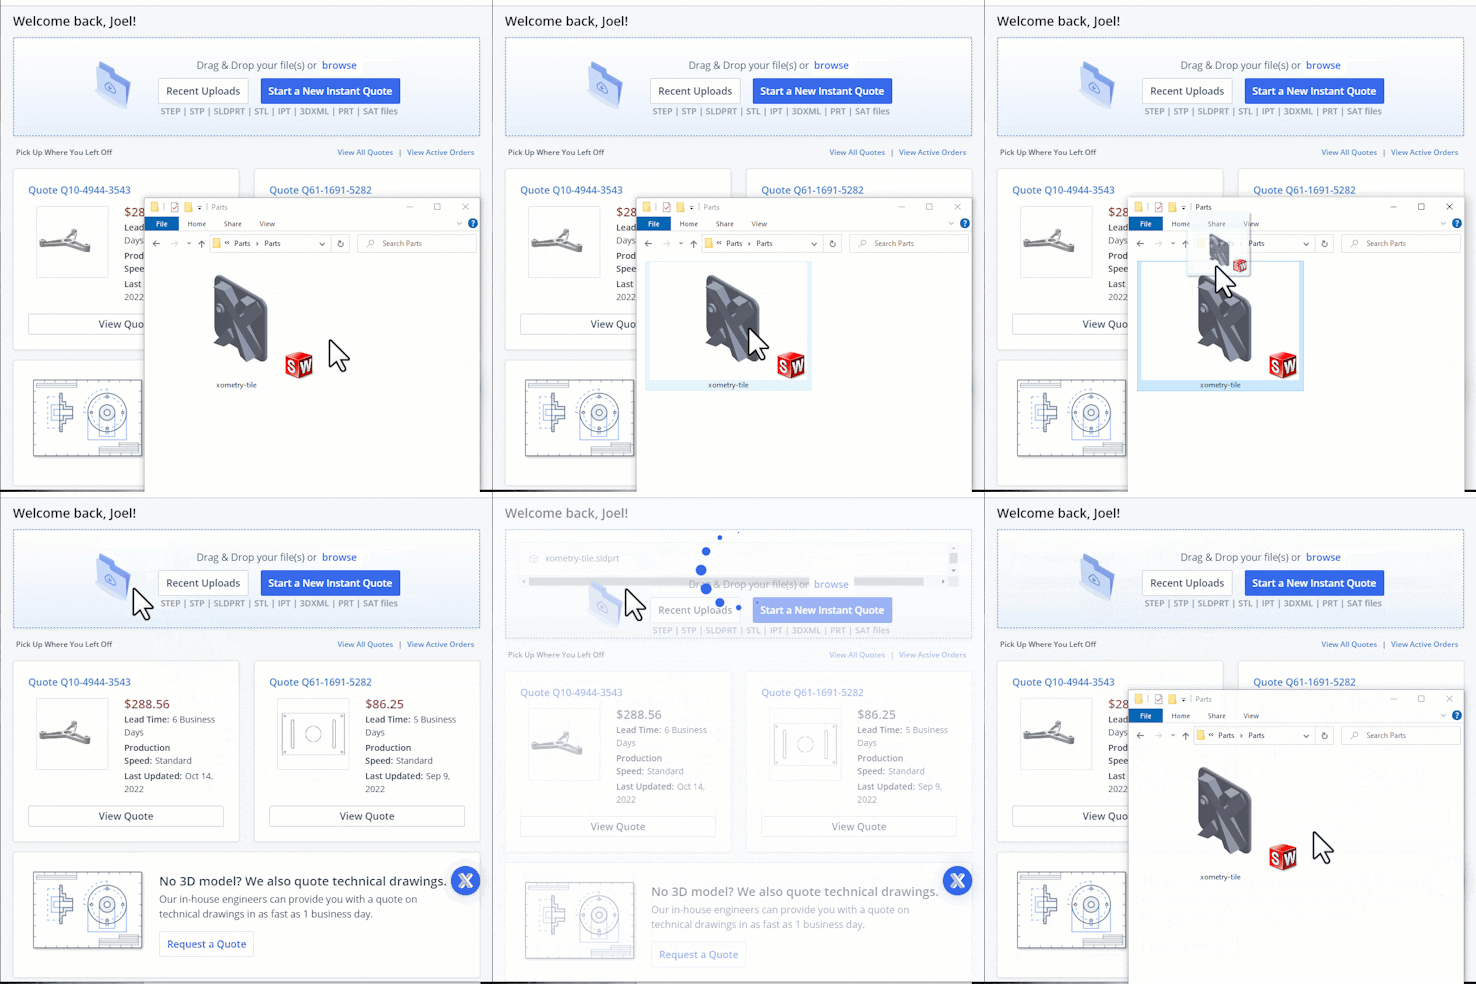
After setting up your account, head to https://www.xometry.com/quoting/home/ and upload your 3D models to receive instant pricing and lead times. Our secure file upload system accepts most CAD file types.
Feel free to upload multiple files at a time. You can select the “Upload 3D Files” button and select your files or drag and drop them into the “drop zone.” You can order your parts at the prices and lead times shown or continue exploring and modifying your quote. There are additional features that can help you build your next big idea.
Did you know Xometry accepts technical drawings as well? Proceed to the part configuration screen to upload your drawings.
Not ready to upload your files? You can still check out our Xometry Instant Quoting Engine® by taking it for a test drive: xometry.com/testdrive/
Step #3: Configure Your Parts
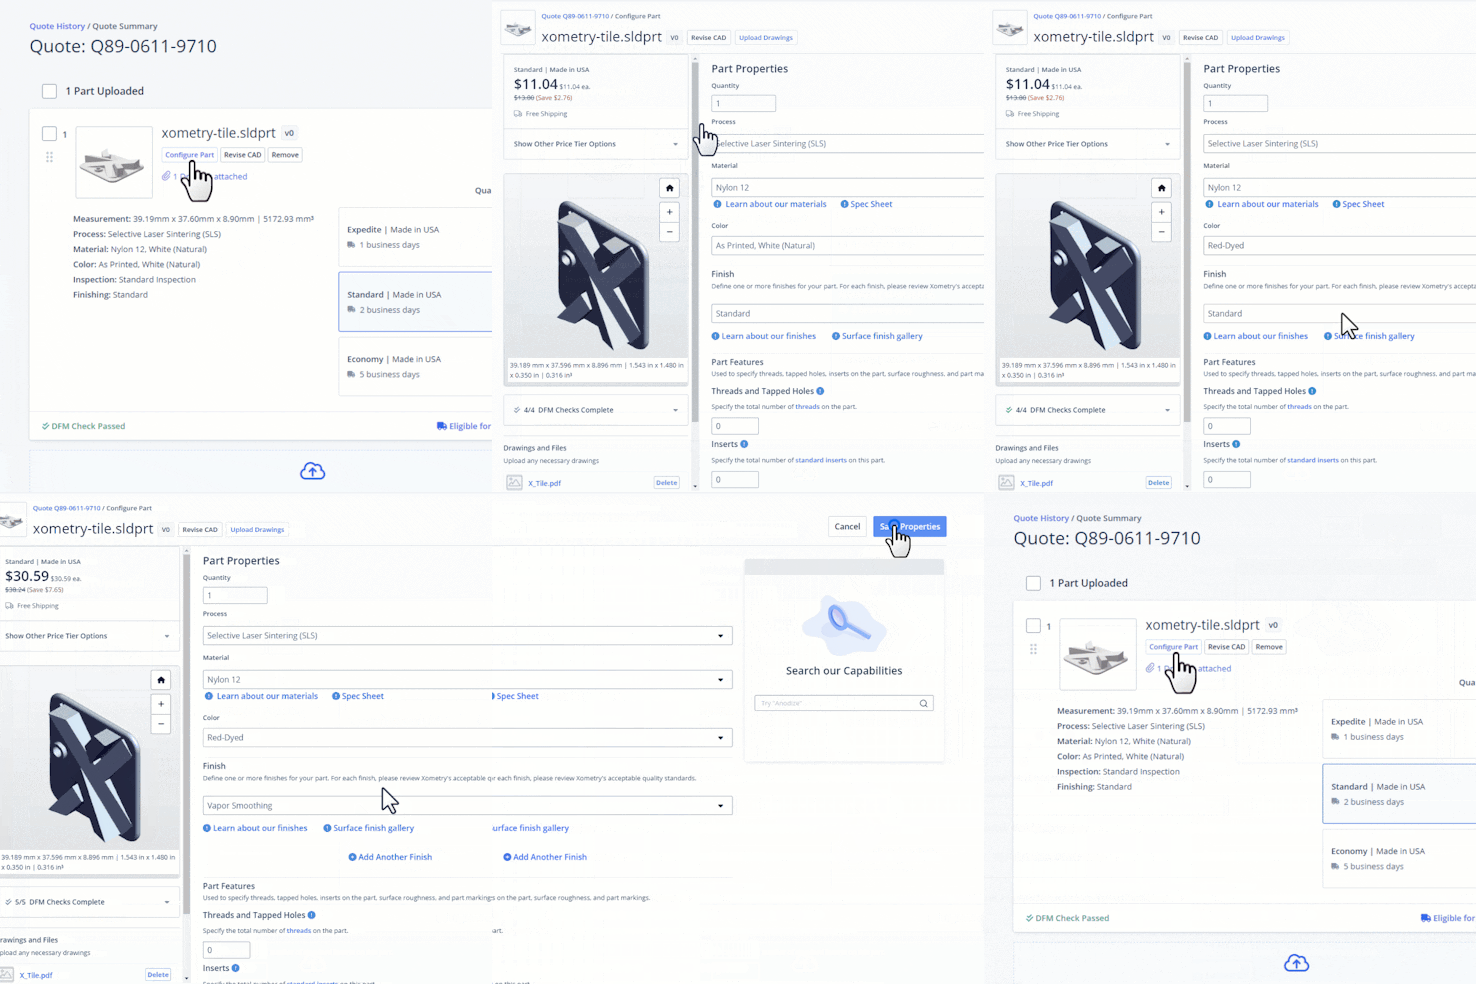
Click the “Configure Part” button or the file title to begin configuring your part. From the Part Configuration Page, you can specify your desired manufacturing process, material, finish, part quantity, and inspection report preferences.
You can also add a number of features, including tapped holes, inserts, and part markings. Pricing and lead times will adjust based on your input. If you require documentation such as material certifications, certificates of conformance, or need to apply certain restrictions such as ITAR, you can select these under the “Part Certifications and Supplier Qualifications” section.
You can leave notes for our engineers and manufacturing partners about your parts in the notes section at the bottom of the Part Configuration Page.
When you are finished configuring the line item, select “Save Properties” in the top right corner.
Did you know: The part configuration is full of helpful resources? For example, you can select “! Learn about our materials” to see our full material list. You can also use the search feature on the right to access helpful design information and resources.
Step #4: Analyze Your Designs
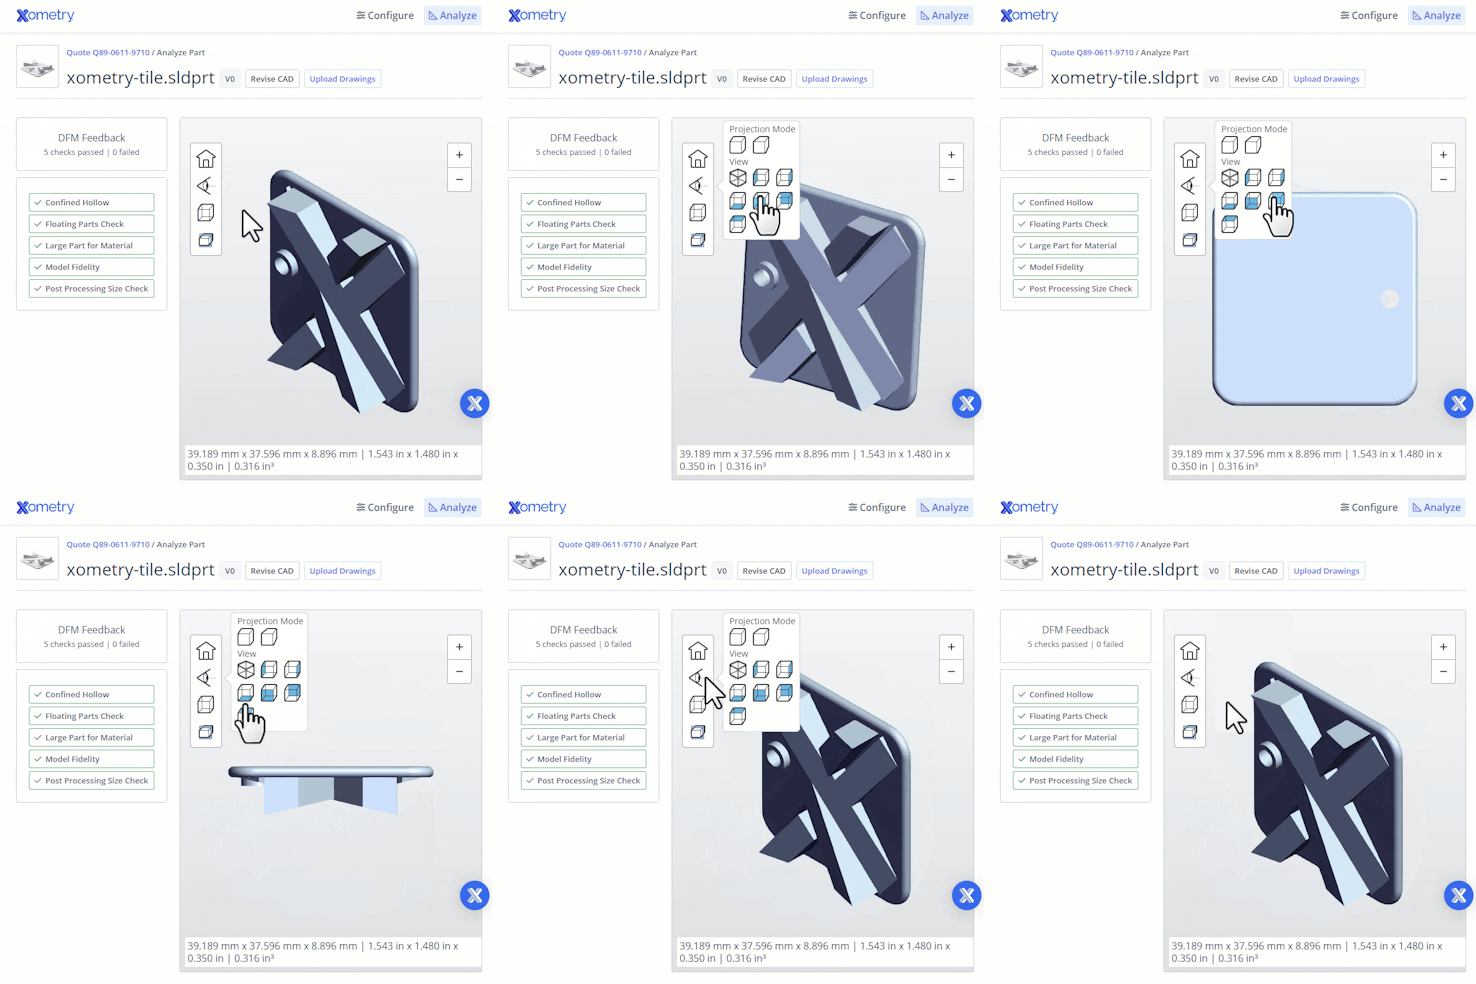
For a detailed view of your uploaded CAD file, click on the “Analyze” tab. This analysis will run an instant design for manufacturability (DFM) check on your part. This feedback helps you optimize your part design by highlighting areas of concern that may need further consideration.
Did you know: You can click and drag the 3D model to check your design from multiple angles? In addition, you can access the module on the left side of the 3D viewer to manipulate the model further, helping narrow your focus to exactly what you want to see.
Step #5: Choose Your Delivery Option
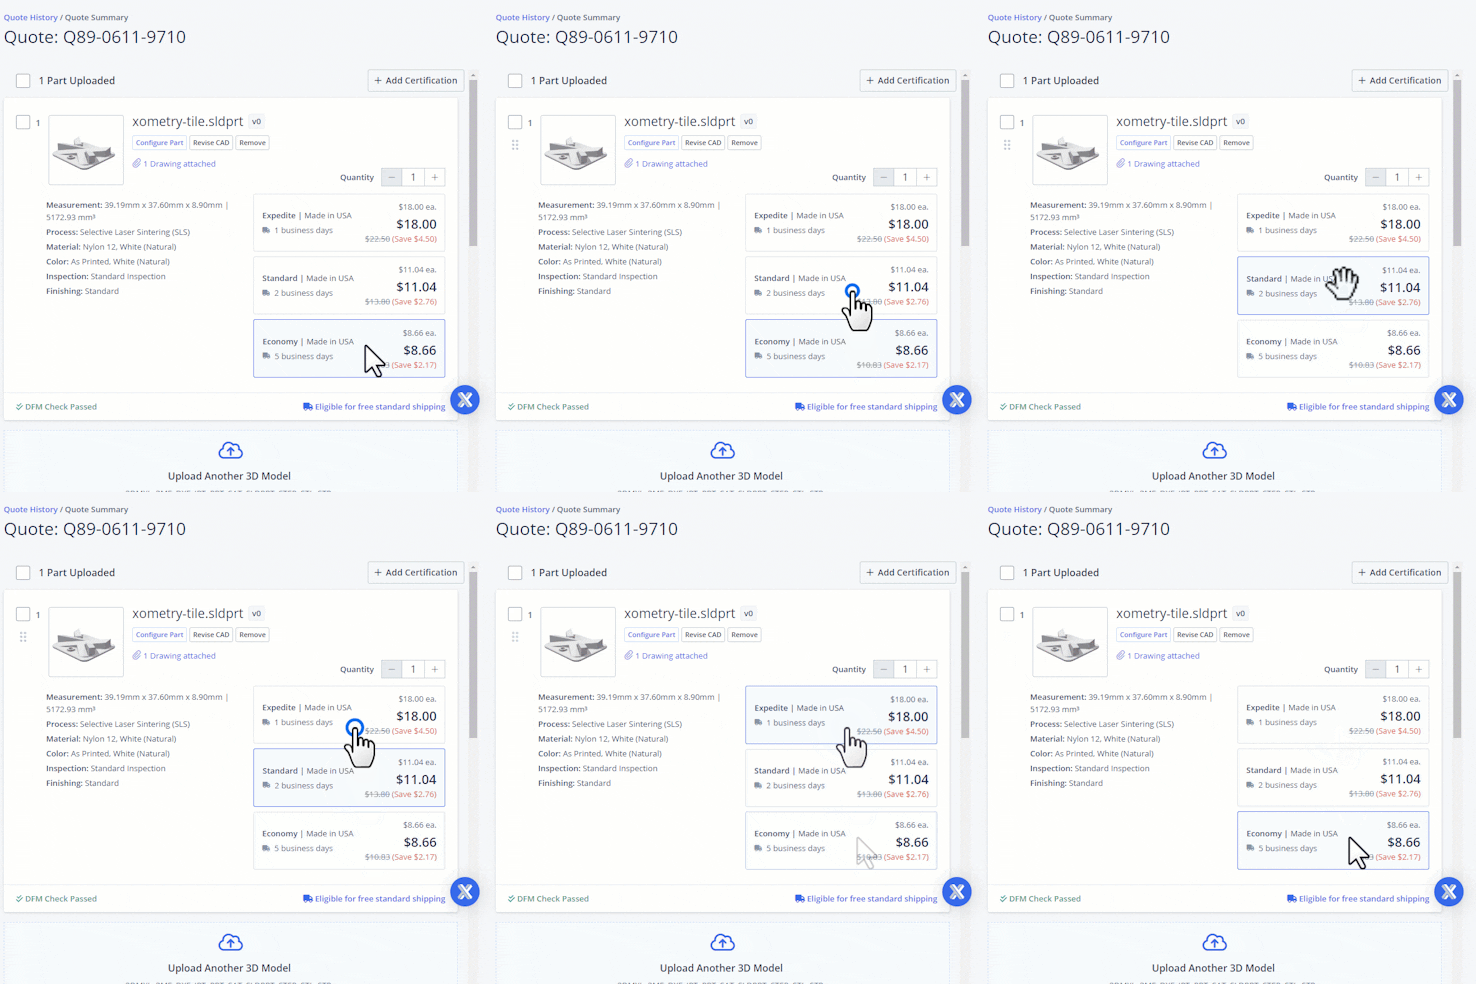
All orders begin with our standard shipping option, which balances your part’s cost and lead time. If you need your project sooner, try out our expedited option. If you have spare time, try our cost-saving economy option.
You can learn more about our lead time options in our article on the subject.
Step #6: Head to Checkout
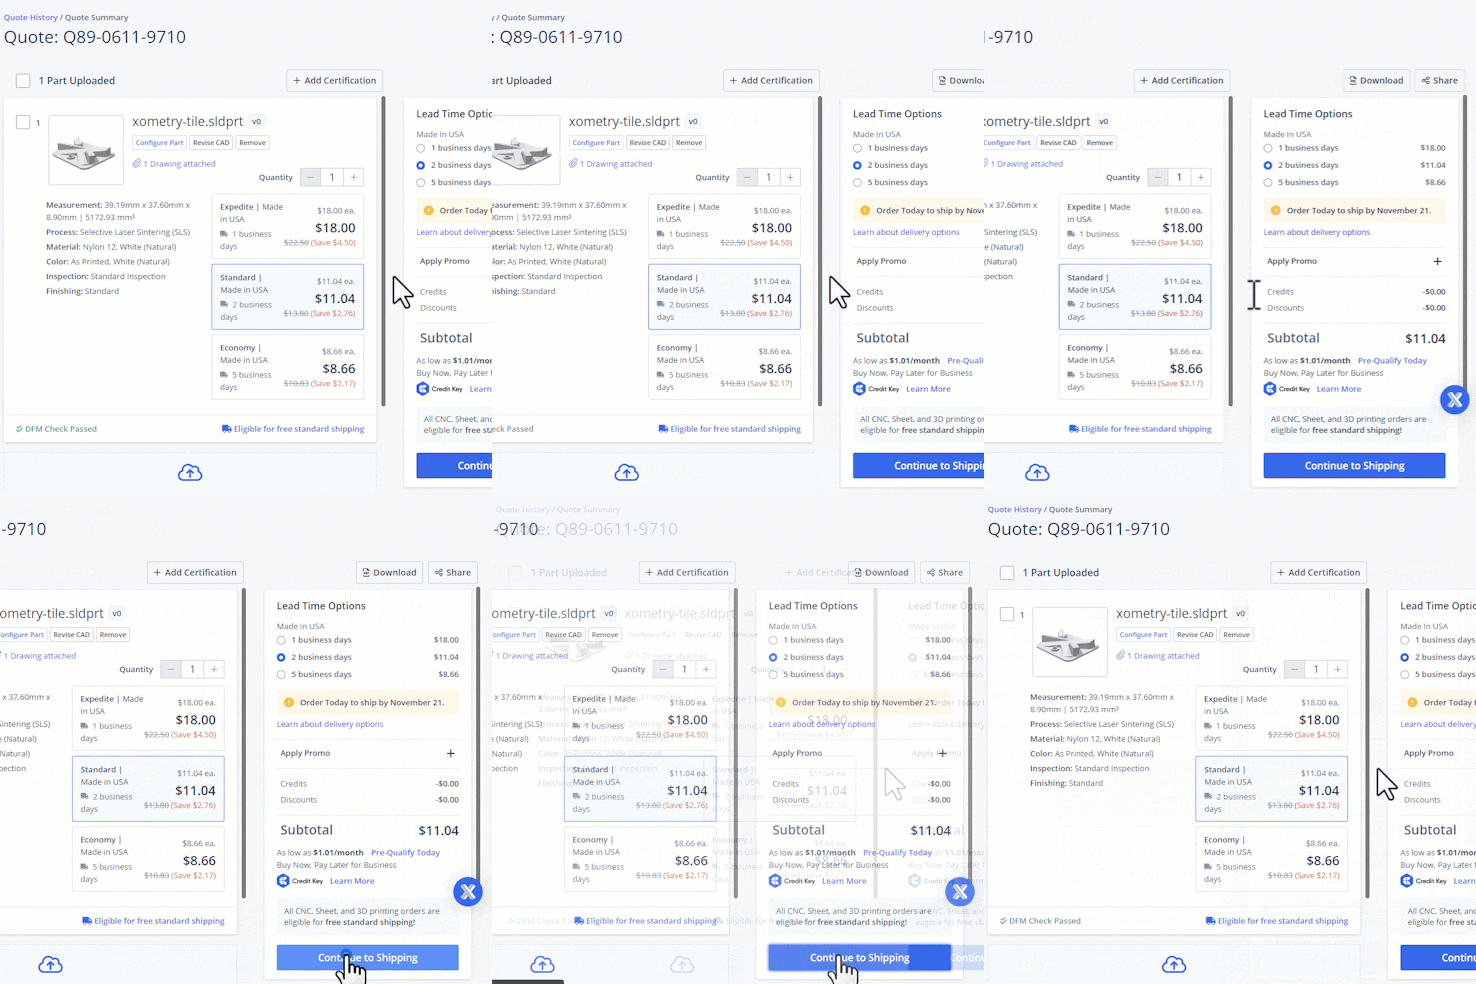
When you are ready to order, click “Continue to Shipping” in the bottom right corner to proceed to the Checkout page. You can also share your quote with a purchaser using the share feature in the top right corner.
Fill in the requested information within the checkout screen. You can edit any information that needs to be updated.
Did you know: You can also apply a promo code to save on your order? As a token of appreciation, you can use promo code “NEW2XOM25” to save $25 on your first purchase. Offer only valid on orders purchased through the Xometry Instant Quoting Engine®. Void where prohibited. One-time use only. Not to be combined with other coupons or offers. Not applicable to shipping charges or sales tax.
Step #7: What's Next?
After placing your order, your project will undergo additional review by our engineers and be assigned to a highly-vetted supplier within Xometry’s manufacturing network.
You’re done!
If you want to check the status of your order at any time, you can click the order number on your Order History page. If you have any questions, our customer service agents and engineering experts are here to help.
After your initial orders, it is simple to set up repeat orders. If you have part revisions or special requests, such as maintaining production at the same supplier, we are happy to accommodate them! Check out our FAQ for more information on setting up repeat orders.


Ready to Build Your Next Big Idea?
Become an Advanced User With These 4 Tips
As you become more familiar with our platform, we encourage you to take advantage of some of our resources for advanced users.
4 Tips for Advanced Users
Tip #1: Download a Xometry CAD-Add-in
You can get our instant pricing, lead times, and design-for-manufacturing feedback directly in your preferred CAD design environments. We offer CAD Add-ins for Autodesk Fusion, SOLIDWORKS, and Onshape.
The Xometry add-in analyzes the geometry of the CAD design and allows the user to select the material, process, and quantity to get real-time pricing and lead times. This seamless integration of custom manufacturing quotes will enable you to move efficiently through your product development process with no platform switching and fast price optimization.
Tip #2: Establish Credit Terms
Businesses can qualify for credit terms, allowing them to place orders with purchase orders (PO) under NET payment terms. With our automated credit review process, it's quick and easy to get started. Learn more about getting on terms within our knowledge base.
Tip #3: Integrate Xometry Directly into Your Procurement System
Automate your purchase orders and save time and money by integrating our technology directly into your e-procurement system via Punchout. We partner with your IT team to quickly develop a simple solution that makes procuring parts from Xometry even easier and more efficient.
Tip #4: Go Green on Your Next Order
As part of our commitment to our Go Green initiative, we offset 100% of all CO2e generated from shipping your order. You can counteract the rest of your order’s manufacturing carbon footprint by supporting carbon offsetting initiatives and renewable energy projects.