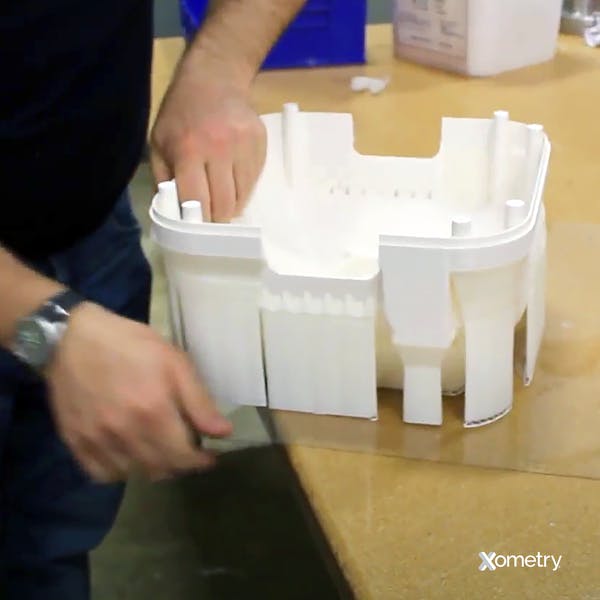
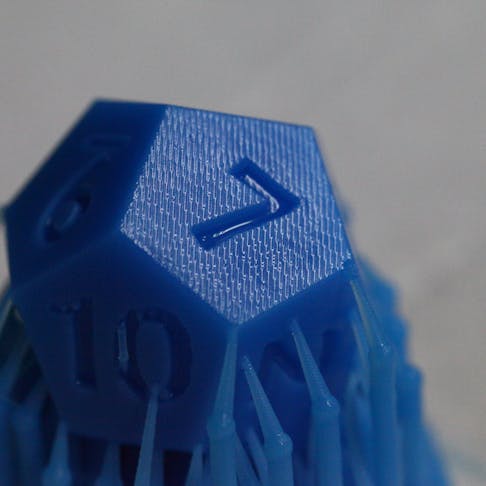
Support structures are vital for printing 3D models with overhangs or bridges. Removing these supports can be a tricky job, possibly leading to damage to the printed model if done incorrectly.
In this article, we look at 10 steps explaining how to remove supports from 3D prints. We also answer a few of the most common questions regarding 3D-printed-support removal.
1. Let the Print Cool Down Completely
Wait until the print has cooled down and cured completely before attempting to remove supports from a 3D print. Attempting to remove supports while the print hasn’t fully hardened makes it much more difficult to get clean results.
Support structures usually have a low density, which makes them easier to break off. When they are still soft and pliable, though, breaking them off isn’t possible, as they will stretch and deform, leaving imperfections. Attempting support removal while the print is soft has a high likelihood that the actual print may be damaged along with the support.
2. Use the Right Tools
Using the right tools for the job can make support removal much easier. The following tools are commonly used for removing supports:
- Needle-Nose Pliers: Needle-nose pliers are useful for getting a strong grip on supports. Their long, thin nose makes it easy to get a precise grip and to get into hard-to-reach places.
- X-Acto Knives: X-acto knives, or similar utility or craft knives, have a sharp, narrow cutting edge. This makes it simple to make precise cuts on smaller supports and ensure you’re cutting the support and not the model.
- Flush Wire Cutter: Flush wire cutters are pliers with a sharp, narrow cutting edge. They offer a good combination of the control and strength of needle-nose pliers, with the precision and sharpness of X-acto knives.
- Files and Sandpaper: Files and sandpaper are used to sand down support structures and any imperfections left behind on the 3D object. Files are generally used for rough work and removing a lot of material, while sandpaper can be used for finer sanding to achieve a smooth finish on the workpiece.
3. Start From the Easy-Access Supports
Start with the supports that are easy to access. Oftentimes, supports can be twisted and broken off quite easily. Needle-nose pliers can be used to grab onto supports near where they meet the model. Care should be taken so that the model itself is not damaged, and this should only be attempted with supports that are fairly hollow and weak.
Flush cutters or an X-acto knife can also be used to cut supports. This might work especially well for denser or harder supports. When cutting the supports, be careful to only cut the support structure so as not to damage the main structure.
Removing 3D printed support is often a matter of personal preference, so experiment with different tools and methods to find the best ones for you.

4. Proceed to the Internal Supports
The internal supports can be a little tricky, due to being in hard-to-reach areas. A combination of flush cutters and needle-nose pliers can be used to reach these areas. The flush cutter can cut the supports, whereafter they can be removed using the pliers. Both tools offer the precision needed to work in these hard-to-reach areas.
5. Be Patient and Gentle During Removal
It is important to be careful while removing supports. The supports meet the 3D model, and it is very easy to damage or nick the print, causing unsightly surface damage, or worse. Take your time, and try different methods until you find one you are comfortable with.
6. Use a Craft Knife for Fine-Tuning and Removing Small Remnants
A craft knife is very useful for cutting support structures, so they can be easily removed with pliers or by hand. They can also be useful for refinement and finishing jobs. Small remnants or rough spots that are too tall for sanding can be cut closer to the 3D print.
7. Sand and Finish the Surface for Smoothness
After the first rough removal of supports, there will likely be surface imperfections left over. At this stage, files and sanding paper should be used to remove any imperfections or surface roughness. Files come in different levels of roughness and are generally a good choice for removing any larger outcroppings or bumps.
Sandpaper can then be used to sand down any roughness on the surface. Moving from rougher grits to finer grits allows for more effective removal of roughness, but be careful to not sand too deeply into the print itself. Needle files are small, narrow files that can be used to file down hard-to-reach places that cannot be reached with sandpaper or regular files.
8. Consider Using Water-Soluble Supports for Complex Prints
For complex prints with many difficult-to-reach areas, water-soluble supports can be a very good choice. This involves printing the actual model with a conventional filament such as ABS or PLA and printing the support structures with a water-soluble filament such as PVA. After the print is completed, the entire structure can then be submerged in warm water to dissolve the supports.
Note that this method only works with dual extrusion 3D printers, in which two different filaments can be printed at the same time. Also, take care when submerging the model that the water is not too hot. This would risk warping the 3D print itself.
9. Adjust Support Settings in Slicer Software for Future Prints
Support structures are typically auto-generated by the 3D printing software used during the 3D modeling of the part. These settings can be adjusted per print to find the balance between adequate support, print time, material usage, and ease of removal.
Settings to consider adjusting include:
- Support Density: Higher density offers better support at the cost of more material used, longer print times, and more difficult removal. A range of 10–20% is a good benchmark and can be increased to 25–30% for larger prints with overhangs.
- Support Type: Tree supports use less material and are easier to break away from the model than normal linear supports.
- Z-Distance: The Z-distance determines the distance between the top of the support and the model itself. Longer distances make removal easier but can offer less support, leading to warping.
Be willing to experiment with these settings to find the right balance for your specific use case.
10. Practice and Learn From Each Print To Improve Technique
There are a lot of options, tools, methods, and settings that can make the experience of removing supports better or worse. Some of these methods and settings might be suitable for certain styles of print or certain materials. Be sure to experiment with different approaches to find a workflow that suits you.
Our very own Senior Solutions Engineer, Matt Schmidt, says "Support removal post processing is very dependent on the part material, geometry and build orientation. The first consideration to support removal is to simulate support growth in a specific build orientation with 3DP software to find out where supports will be needed and if they are acceptable for post processing removal methods. Trapped or internal support conditions for polymer supports are easier to process than steel support structures, for example. Metal support structures may require traditional manufacturing processes like CNC that may be limited by the part geometry and support accessibility. Polymer supports can often be dissolved by water bath, while metal supports require much greater effort with machining. Upfront DFAM is critical to understanding where supports may be needed and how they will be removed to create a successful 3DP part."
Things Than Can Make Supports Hard to Remove
3D printing supports can be hard to remove for several reasons:
- The support material can be hard, and difficult to cut.
- The structure of the support can be denser than needed, also making it more difficult to cut.
- The support can be in a hard-to-reach area of the print.
- The number of supports can be too many, to the point at which it gets difficult to cut or break supports precisely.
- The size of the contact area between the support and the model can be too large to remove effectively.
Minimizing the Supports When Designing 3D Printed Parts
The number of supports in a 3D print mainly depends on two factors: support settings and model geometry. The model geometry ultimately determines whether supports are necessary. Overhangs or bridges require supports to prevent deformations and warping as part of the printing process. The number of supports can also be minimized by removing or minimizing the number and extent of overhangs in a model.
Support settings can usually be configured in your 3D printing software of choice. These settings include the support type, the infill pattern of the support, the support density, the thickness of the infill layers, the overhang angle at which supports are necessary, the minimum support area, and the placement of the supports. These settings affect how many supports are used in the print, as well as the amount of material used in these supports.
Things to Do After Removing the Supports From 3D Printed Parts
After removing the supports from 3D printing, there are a few optional post-processing steps you could do:
- Sanding: Any remaining protrusions of the support structures can be sanded, filed, or deburred to create a relatively smooth surface.
- Filling: If the part was damaged in the support removal process, it can be filled to get it closer to its original state.
- Smoothing: Chemical smoothing can remove fine artifacts and layer lines, leaving an incredibly smooth surface finish.
- Painting: The 3D model can optionally be painted to give it a specific aesthetic and hide any remaining surface imperfections.
How Xometry Can Help
Xometry has a wide arrange of custom 3D printing services to choose from. When you order a 3D print through us, we handle all of the post-processing steps necessary, including support removal. We also offer processes that don't require support structures, such as SLS and MJF powder-bed technologies, freeing up your design options. You can see all of our options by uploading your CAD files to the Xometry Instant Quoting Engine® today and get an instant quote!
Disclaimer
The content appearing on this webpage is for informational purposes only. Xometry makes no representation or warranty of any kind, be it expressed or implied, as to the accuracy, completeness, or validity of the information. Any performance parameters, geometric tolerances, specific design features, quality and types of materials, or processes should not be inferred to represent what will be delivered by third-party suppliers or manufacturers through Xometry’s network. Buyers seeking quotes for parts are responsible for defining the specific requirements for those parts. Please refer to our terms and conditions for more information.

