PPAP (Production Part Approval Process) is a standardized procedure that establishes clear deliverables that must be satisfied before a new part can be introduced to the market. Manufacturers that adhere to PPAP principles can take advantage of faster time to market, more consistent quality, and a broader and more satisfied customer base. To take advantage of the benefits of PPAP, manufacturers must first familiarize themselves with its standards, procedures, and audit requirements. This article will discuss the PPAP certification definition, audit requirements, criteria, and related standards.
What Is PPAP Certification?
PPAP is a procedure used by automotive manufacturers to define the steps and deliverables that must be satisfied to approve new or revised parts. As such, customers use PPAP to verify whether a particular manufacturer can reliably and repeatedly fabricate parts for mass production. PPAP is a comprehensive process comprising 18 elements that characterize the items needed for part approval. These elements relate to engineering changes, design records, control plans, and more. Satisfying these 18 requirements and complying with PPAP principles not only shows customers that a particular manufacturer can repeatedly produce high-quality parts but also shows that they are responsive to customer concerns.
PPAP is one of the five core tools used by automotive manufacturers for quality management, along with APQP (Advanced Product Quality Planning), FMEA (Failure Mode & Effects Analysis), SPC (Statistical Process Control), and MSA (Measurement Systems Analysis). PPAP certification is issued by the Automotive Industry Action Group (AIAG), a non-profit organization composed of thousands of automotive OEMs and suppliers around the world.
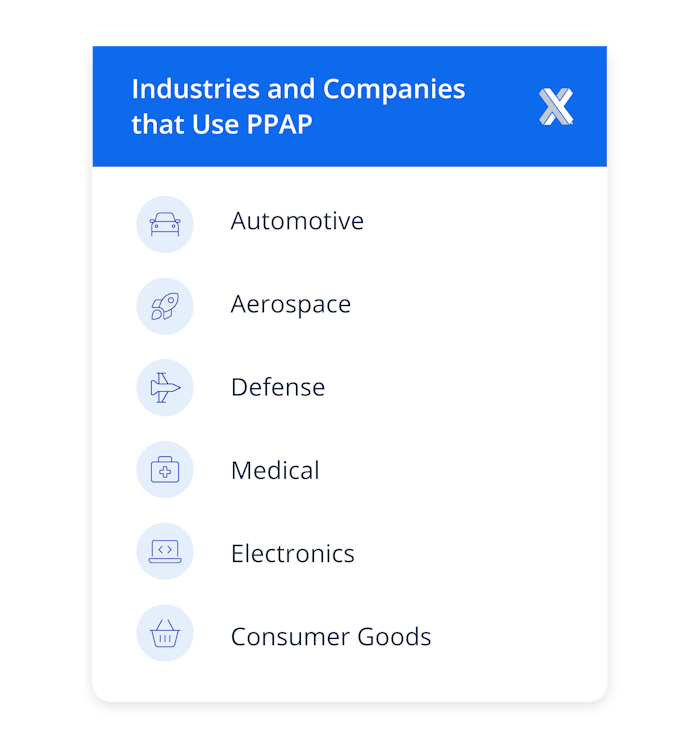
Industries and Companies that Use PPAP
PPAP was originally developed for use in the automotive industry. However, numerous other industries have taken note of the advantages PPAP offers and have applied them to their own processes for introducing new products. PPAP is relevant for any company within any industry that would like to standardize its processes for designing new products, ensure consistent quality, and expand its customer base. Some of the major industries to which PPAP has been adapted are listed below:

Types of PPAP Submissions
There are five different types of PPAP submissions that manufacturers present to their customers. The type of submission given to a customer largely depends on what they would like to verify before accepting the part for series production. Manufacturers submit a part submission warrant (PSW) with varying levels of supporting data to the customer depending on the type of PPAP submission. PSWs are a high level summary of the developed product and the first item in a PPAP document. PSWs verify that a manufactured product meets all the customer’s standards. The five types of PPAP submissions are listed and described below:
- Level 1: In Level 1 submissions, manufacturers supply only the PSW to the customer. No samples or supporting data are included.
- Level 2: Level 2 submissions must include product samples and relevant product testing data. Such data includes measurement analyses, dimensional results, performance testing results, design records, and all engineering change documents.
- Level 3: Level 3 PPAP submissions require manufacturers to supply the PSW accompanied by product samples and all supporting data. Data to include encompasses everything from Level 2 submission material plus design and process FMEA documents, process flow diagrams, and process studies.
- Level 4: In Level 4 submissions, the customer requires the PSW and can define any additional requirements they feel are needed to ascertain the quality of the manufactured product.
- Level 5: Level 5 submissions require manufacturers to supply the PSW, samples, and all supporting data for customers to review at the manufacturer’s facility. Data includes all FMEA documents, process flow diagrams and studies, quality test results, dimension test reports, and more.
PPAP Audit Criteria
PPAP consists of 18 elements related to the processes and documents needed to successfully design a product and initiate series production. Satisfying these 18 elements helps to instill confidence in manufacturers and their processes. The 18 elements are listed below:
- Design Documentation: This includes part drawings, relevant material specifications, and anything else that may be relevant to the product design.
- Engineering Change Documentation: These documents are considered only if there is a change in the product design.
- Customer Engineering Approval: When submitting a product for approval, manufacturers must show documentation that proves that the customer’s engineering department approved the product.
- Design Failure Mode and Effects Analysis: DFMEA is required to analyze design risk by considering potential failure modes and the possible effects on the designed product or user.
- Process Flow Diagram: PFDs show each fabrication step for a product, and the flow of material from one process to the next.
- Process FMEA: PFMEAs analyze risks associated with possible process mishaps and their effects on product quality.
- Control Plan: The control plan is a product of the PFMEA which ensures that products are manufactured to consistently meet customer requirements. A comprehensive control plan will prepare for process irregularities and describe solutions for how to overcome these irregularities.
- Measurement Systems Analysis (MSA): This includes studies on the devices used to measure product dimensions and associated calibration records.
- Dimensional Report: Dimensional reports verify that a manufacturing product meets the designed dimensions.
- Material and Performance Test Results: This element contains results from the various material and performance tests used to verify product function.
- Initial Process Studies: These studies are used to show that manufacturing processes are stable and show the normal variation from the desired manufacturing parameter (cycle time, material usage, etc.).
- Laboratory Documentation: This includes documentation to verify that the particular test laboratory complies with industry regulatory standards.
- Appearance Approval Report: AARs confirm that the customer has reviewed and inspected the appearance of the final designed product.
- Sample Production Parts: Images of sample parts are included in the PPAP submission.
- Master Sample: Both customer and manufacturer sign off on a single "master" part that is commonly used to train production staff on inspection points.
- Visual Aids: Manufacturers use visual aids to produce a comprehensive list of the tools and devices needed to measure and inspect parts.
- Customer-Specific Compliance Records: Manufacturers must supply documentation that proves customer-specific requirements have been satisfied.
- PSW: The PSW (Production Submission Warrant) is a summary of the PPAP documentation and shows critical information such as drawings and product and material testing results.
The PPAP Audit and Accreditation Process
PPAP is a part of APQP and the broader IATF 16949 standard. There is no specific PPAP audit and accreditation process. Instead, PPAP is a framework of procedures used by manufacturers to show their customers that they can produce products consistently based on their standards. For manufacturers, the PPAP audit and accreditation process starts with showing that they can satisfy the 18 elements of PPAP when designing a new product.
Benefits of a PPAP Certification
The PPAP process offers numerous benefits for automotive manufacturers, from improved part quality and faster time to market, to better customer relations. Some of the benefits are listed and described below:
- Consistent Product Quality: PPAP requires manufacturers and customers to agree on the design requirements, manufacturing processes, and deliverables needed to introduce a new part. This helps reduce part defects, makes processes more efficient, and helps maintain design integrity.
- Improved Customer Relations: Detailed and thorough collaboration between customers and suppliers is a foundational piece of PPAP. For manufacturers, adhering to PPAP standards shows customers that they are responsive, can produce consistent high-quality products, and have robust processes in place to address quality or process concerns.
- Faster Time to Market: PPAP standardizes the processes and documentation needed to introduce a new product to the market. PPAP sets clear expectations for what the customer would like to see in a new part, the processes needed to produce the said part, and the procedures by which manufacturers solve design, quality, or manufacturing issues should things go awry.
- Dependable Part Approval Process: Customers can confidently approve new parts that are made by manufacturers that comply with PPAP standards. They know that products are made to high standards and that manufacturers have completed their due diligence.
When PPAP Certifications are Required for Companies
While PPAP certification is not necessarily required for non-automotive manufacturers, PPAP certification is required for all Tier 1 automotive manufacturers when introducing new products to the market, or when there is a substantial change to an existing product or process. This is because PPAP is part of the APQP (advanced product quality planning) standard, which itself is part of the broader IATF 19649 standard that applies to all automotive manufacturers. Manufacturers outside the automotive industry may elect to obtain PPAP certification to show customers that they can produce consistently high-quality products and are responsive to their needs.
Accrediting Body of the PPAP Certification
The Automotive Industry Action Group (AIAG) issues PPAP certifications and has developed a common standard for the process. However, some OEMs have distinct requirements that supplement the PPAP standard established by the AIAG. The PPAP standard was created by AIAG with input from the “Big 3” American automotive manufacturers. Since then, PPAP use has expanded to a number of industries beyond the automotive sector.
Certifications and Accreditations Similar to PPAP
Several certifications and accreditations similar to PPAP exist. Like PPAP, these can be used to assure customers of a product’s quality and a manufacturer’s capability to produce them. Some certifications and accreditations similar to PPAP are listed below.
- Certificate of Compliance (CoC): Similar to a PPAP submission, a certificate of compliance is a document that attests that the quality of a particular product satisfies individual customer or industry requirements. CoCs are issued by a third party unrelated to the manufacturer.
- Material Test Report (MTR): MTRs are certified documents that show that material is compliant with regulatory or industry standards. MTRs are issued by the material manufacturer and accompany the material as it progresses through the supply chain and is fabricated into complete parts.
- Initial Sample Inspection Report (ISIR): An ISIR certification is usually issued to a customer the first time a product is supplied to them by a manufacturer, but before mass manufacturing begins. ISIRs are documents that show customers that the product meets their quality requirements, and include items such as dimensions, quality test results, and more.
- First Article Inspection (FAI): FAI is similar to ISIR except that FAIs are verified by an authorized third party such as a laboratory. FAIs apply to a batch of parts from the first production run of a new part. These parts are inspected in a laboratory using special measuring equipment where the third party verifies whether the part’s dimensions and function satisfy the customer’s requirements.
Summary
This article presented the PPAP certification, explained it, and discussed its standards and audit requirements. To learn more about certifications, contact a Xometry representative.
Xometry provides a wide range of manufacturing capabilities and other value-added services for all of your prototyping and production needs. Visit our website to learn more or to request a free, no-obligation quote.
Disclaimer
The content appearing on this webpage is for informational purposes only. Xometry makes no representation or warranty of any kind, be it expressed or implied, as to the accuracy, completeness, or validity of the information. Any performance parameters, geometric tolerances, specific design features, quality and types of materials, or processes should not be inferred to represent what will be delivered by third-party suppliers or manufacturers through Xometry’s network. Buyers seeking quotes for parts are responsible for defining the specific requirements for those parts. Please refer to our terms and conditions for more information.


